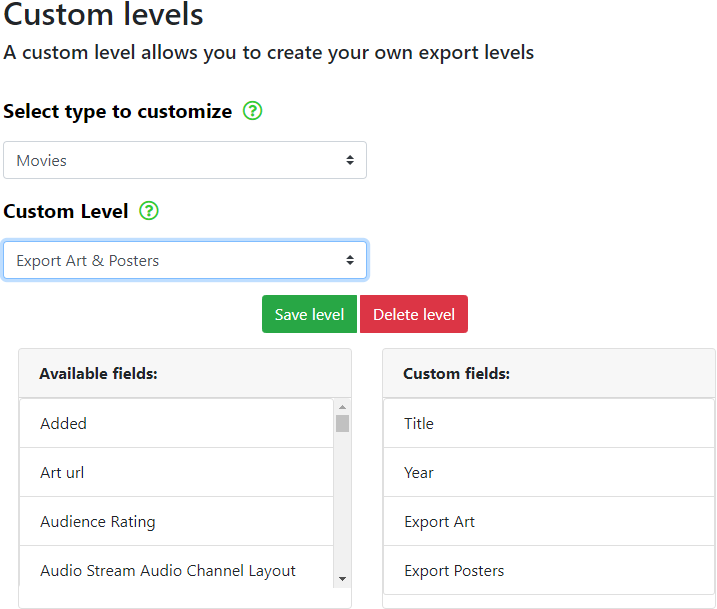
ExportTools Custom Levels are used to provide you with a means of customizing the output of your data. You may include or exclude any of the various fields in your .csv/.xlsx file.
See the following pages for details regarding all of the available fields for Custom Levels.
All Available Fields for Levels
All Available Fields for Playlists
See the link below for all available built-in levels for the ExportTools module.
All Built in Levels

To create a custom level of your very own, follow the steps below:
Select type to customize
Select the type of library your custom level is intended for.
Custom Level
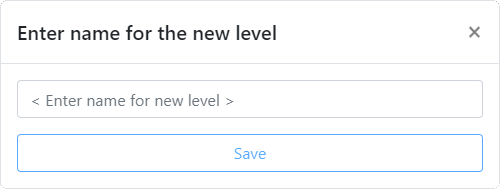
Click on the custom level drop down menu and select <Define new level>.
The following dialogue will appear.

It is a good idea to include the library type or field type/s in the name of your Custom Level, so you don't forget which library type or fields your Custom Level is intended to output.
Click on Save when you are done.
Available fields
Scroll down to Available fields and select a field you wish to include in your Custom Level from the list of available fields.
Click and hold the left mouse button on your selected field and drag it to the Custom fields box on the right.
Repeat for all of the fields that you wish to include in your Custom Level.
You may left click on a field in the Custom fields box and drag it back to the Available fields box to remove an unwanted field.
When selecting the Export Posters or Export Art fields, please make sure you have configured the poster or art dimensions on the ExportTools Settings page.
Save Level
When you are done selecting the Custom fields and you have your Custom Level selected in the Custom Level drop down menu, click on the Save Level button.
ExportTools
Click on the ExportTools button on the top left of the window and then, Select Export Type, Select Sub Type, Select Media Library and select your Custom Level from the Export Level drop down menu and click on the Export Media button.
You should now have a .csv and/or .xlsx file in your selected output directory (configured in Global Settings > Export Settings), that is filled only with your Custom fields.
Note: When selecting the Export Posters or Export Art fields, please make sure you have configured the poster and/or art dimensions on the ExportTools settings page. Also, make sure your Custom Level includes at least the Title as well as Export Art and/or Export Posters.
Note: When adding Export Art, Export Posters, Export Show Art, Export Season Posters or Export Show Posters to a Custom Level, these items will always be sorted to the bottom of the list. You may sort any of the fields above these items, but not below them. The field order will resort to these items being at the bottom of the list upon saving the Custom Level. Thanks go to kiwichick888 for reminding us of this :)
Note: When exporting Art and/or Posters, do note that the art and/or posters may not be in the specified resolution. This is due to the way Plex exports the images. The resolution may depend on the image resolution and aspect ratio of the images that your Plex Media Server has stored and the image resolution and aspect ratio you have specified in the settings.
Note: If you choose to output the Sort Title field, then be aware it may not be populated, because Plex tend to generate this field on the fly in Plex/Web and it may not be captured by ExportTools.
To edit a Custom Level, go to the Custom Levels page.
Select the type of export you wish to use from the Select type to customise drop down menu, then select a previously saved Custom Level from the Custom Level drop down menu.
Now, you may add or remove any of the Available fields to or from the Custom fields area.
Click on Save level when you are done editing the Custom Level.
See the Help page for details on creating a custom level and exporting Art & Posters from a Movies library.
See the Help page to set the default column separator for Microsoft Excel in Windows 10.
See the Help page for details on importing a .csv file into Microsoft Excel.
- All Rights Reserved - WebTools-NG